Well, it is that time of the year when I love bright colors that make me feel festive. These multi colored mini M&M's look perfect against the creamy light yellow-colored cookies.
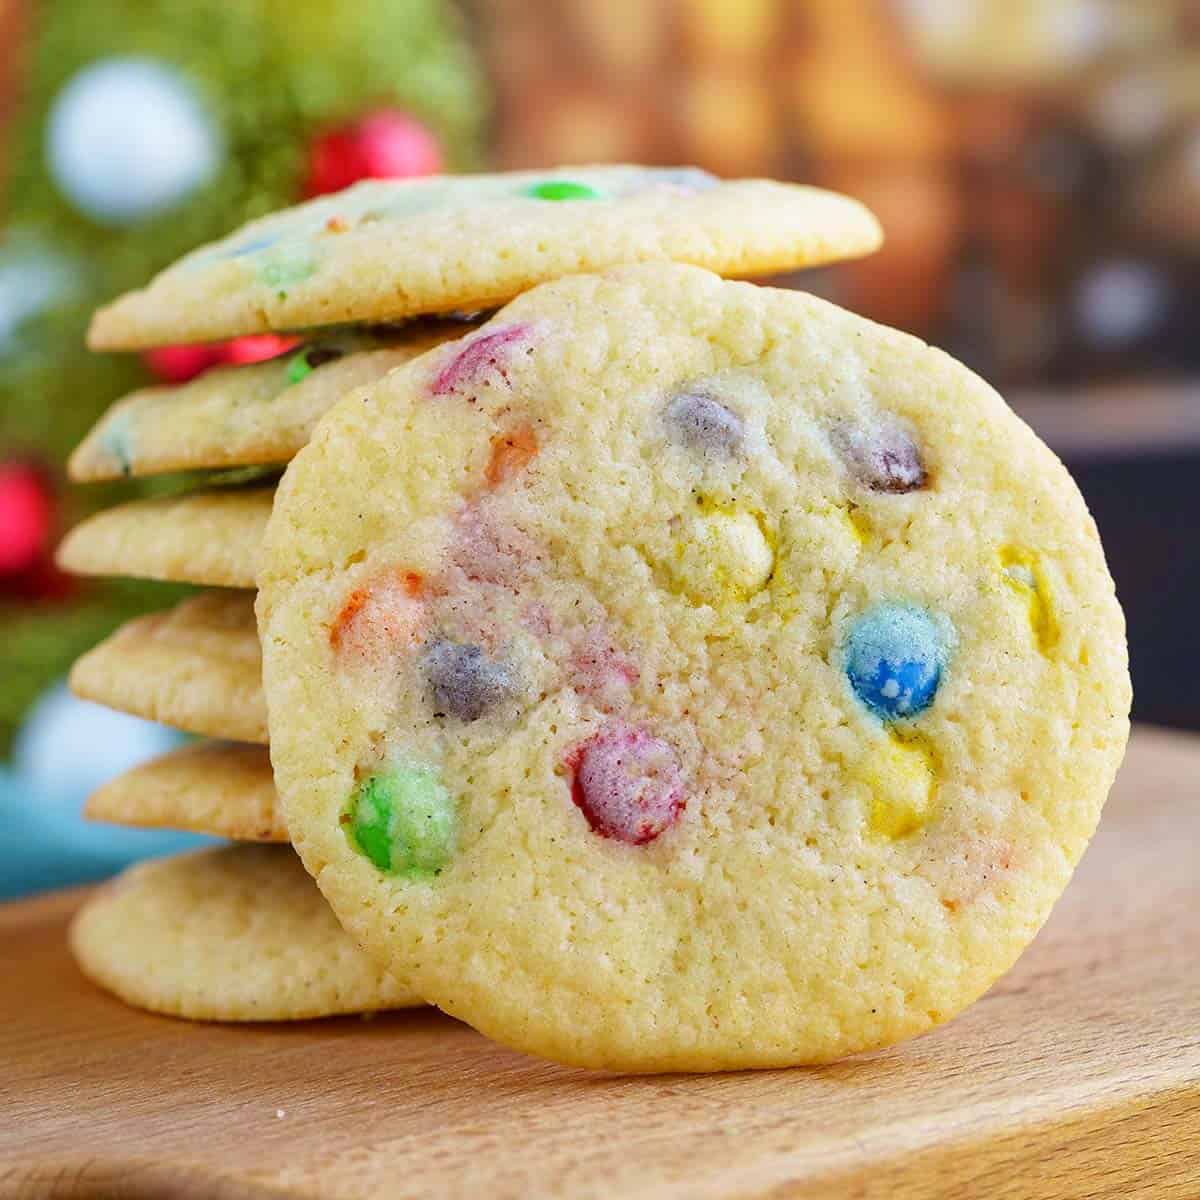
I added a touch of maple syrup to go along with the small amount of light brown sugar. They are chewy and crunchy at the same time.
Ingredients

- Butter unsalted
- Sugar white
- Light brown sugar
- Pure maple syrup
- Vanilla bean paste
- Vanilla Extract
- Eggs
- All-purpose flour
- Kosher Salt
- Baking powder
- Mini M&M's
Ingredient Tips! Room Temperature Ingredients
I sometimes forget to take the butter out of the refrigerator so that it can come up to room temperature. Plus, eggs mix into the cookie dough easier if they are not ice cold. This is what I do to help it along.

Cut the butter into small cube and lay them out on a plate. This put warmer air around the cubes instead of trying to warm up a whole stick.

For eggs, I put warm water into a bowl and add the eggs to it. I rotate them around for a couple of minute. DO NOT USE HOT WATER. You do not want to cook the eggs, just warm them up a little.
Making M&M Cookies
The mini M&M's are festive looking and just make these cookies stand out. These are very easy to make and a great cookie to have the kids help.
Prepping
First thing I do is get my ingredients ready, so all I have to do is add them to the mixing bowl. Weigh or measure the sugars into a bowl and set it aside. Next, weigh or measure the flour. Add to the flour the salt and the baking powder. I use a whisk to blend them together. Now I am ready to start.
Mixing the Cookie Dough

Add the cubed butter to the mixer bowl. How cold the butter is will determine the time you will need to cream the butter.

Normally it takes about 2 minutes on a medium mixer speed to cream the butter. You want soft looking peaks and the butter to look smooth and creamy.

Now, add both of the sugars and mix on a medium mixer speed for 3 minutes. There is a little more sugar than butter, so it will look a little grainy.

Next, add the pure maple syrup, vanilla bean paste, and the vanilla extract and mix them together. I then scrape down the bowl and blend for another 10 seconds.

I take one egg and break it into a small bowl just to make sure there are no egg shells and add it to the cookie dough. Incorporate that egg, then add the second egg.

Turn the mixer to a low mixer speed and add about ⅓ of the flour mixture at a time. Try not to over mix. It should only take about a minute to get all the flour mixture added. Scrape down the bowl and incorporate any loose flour that may have been missed.

Now is the time to add the mini M&M's to the cookie dough. You don't want to break them up, so only turn the mixer on lower for about 5 seconds.

I take a one piece spatula and make sure the M&M's are scattered throughout the cookie dough.
Tare off a piece of plastic wrap to put across the top of the bowl and refrigerate for 2 hours. I do this so that the sugar, butter and flour completely meld into each other. It helps them from becoming a completely flat cookie.
Scoop and Bake
Turn the oven on and set it at 350°F (175°C or 180°C). Grab 2 cookie sheet pans (mine are half sheet pans) and add a parchment paper sheet to each one. These cookies will spread as they bake. For that reason, I only add 9 scoops of cookie dough to a pan. You can, of course, add twelve, but some will probably touch each other.

Bake at 350°F (175°C or 180°C) for 10-12 minutes. Once out of the oven, leave them on the pan for a minute before moving them to a cooling rack.

Enjoy!
FAQs
Yes, you can just keep in mind that a cup of the regular M&M's will not have as many pieces, so you will not have as many M&M's in each cookie.
I used one of those Glad containers with a tight-fitting lid. The cookies will last for around a week or a little more.
My grocery store carries them and I also saw some Walmart's have them. During the summer heat, I will not order any chocolate candy pieces that have to be shipped. I have had it come to me melted and pretty much a solid block of nothing I can use. But since it is Nov., Amazon has the green and red M&M's or the full color ones.
Other Holiday Cookies
Recipe
Mini M&M Cookies
Would you like to save this recipe?
Ingredients
- 1 cup (227 g) Butter unsalted room temperature
- 1 cup (200 g) Sugar white
- ¼ cup (55 g) Light brown sugar
- 1 Tablespoon (1 Tablespoon) Pure maple syrup
- 1 teaspoon (1 teaspoon) Vanilla bean paste
- 1 teaspoon (1 teaspoon) Vanilla Extract
- 2 (2) Eggs
- 2 ¼ cups (281.25 g) All-purpose flour
- ½ teaspoon (0.5 teaspoon) Kosher Salt
- 1 teaspoon (1 teaspoon) Baking powder
- 1 cup (236.59 g) Mini M&M's
Instructions
- Weigh or measure the white and light brown sugar into a bowl and set aside. In another bowl, weigh or measure the flour, salt, baking powder, running a whisk through to blend.
- In a stand or hand-held mixer, cream the butter until it is light in color for about a minute or two. Add the white and light brown sugars and mix on medium speed for 3 minutes, so the sugars are incorporated into the butter. Stop the mixer and scrape down the sides and across the bottom. Add the vanilla extract, vanilla bean paste, and maple syrup. Mix until all is blended through.
- Next, add one egg at a time, letting the first egg mix through before adding the 2nd egg. I always crack the egg into a small bowl before adding to the batter. I have the bad luck of a piece of eggshell ending up in my batter if I break the egg against the mixing bowl. Turn the mixer down and add the flour mixture about a ⅓ at a time until incorporated. This usually only takes about a minute. Stop and scrape down the sides and across the bottom before adding the mini M&M's. Mix the M&M's through, then cover loosely and refrigerate for at least 2 hours.
- Preheat the oven to 350°F (175°C or 180°C), and line 2 cookie sheet pans with parchment paper. Take the cookie dough out of the refrigerator. Using a medium cookie scoop, add 9 scoops to a pan. These cookies spread some, so I only did 9 scoops to a cookie sheet. Bake for 10-12 minutes. Pull them out when the edges start to lightly brown. The tops will be soft, so leave them on the pan for a minute after taking them out of the oven. Then move them to a cooling rack to finish.
Share this recipe
NUTRITION DISCLAIMER
I am not a certified Dietitian or Nutritionist. The nutrition amounts given below are provided through a program and are only a guideline.






Join the Discussion