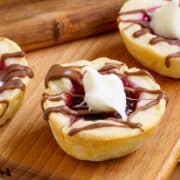

Raspberry with Chocolate Cookie Cups
These butter and cream cheese cookie cups are the perfect container for the raspberry filling. Adding the white and milk chocolate for toppings on the cookie cup.
Servings: 48 cookies
Calories: 174kcal
Ingredients
Raspberry Homemade Filling
- 24 ounces (18 ounces) Raspberry
- ½ cup (100 g) Sugar
- ½ teaspoon (0.25 teaspoon) Lemon zest
- 2 teaspoon (2 teaspoon) Lemon juice
- 2 teaspoon (2 teaspoon) Corn Starch
(OR) Raspberry Store Bought Filling
- 26 ounces Raspberry Preserves 2 13oz jars
Cookie Cups
- 1 cup (227 g) Butter unsalted
- 6 ounces (6 ounces) Cream Cheese
- ½ teaspoon (0.25 teaspoon) Vanilla extract
- 2 ½ cups (312.5 g) All-purpose flour
- ½ teaspoon Kosher Salt
Toppings
- 1 cup Milk chocolate wafers
- 1 cup White chocolate wafers
- ½ cup Chopped hazelnuts
- 12 ounces Raspberries
Instructions
Raspberry Filling
- Combine the 24 oz of raspberries, sugar, and lemon zest. Bring mixture to a boil over medium high heat, then reduce the heat to medium. You want a low boil.
- As you stir, keep pressing the raspberries against the pan's side to break them apart as they become tender. This step may require 10 minutes. Combine the lemon juice with the cornstarch and incorporate it into the pan. Reduce the heat to achieve a gentle boiling point. Stir continuously for 5-7 minutes until the mixture thickens.
- Take the pan off the heat and let it cool down for about 10 minutes before placing it in a glass jar that has a lid and let it continue to cool down for 30 minutes. Cover and place in the refrigerator. I like to do the raspberry jam filling the day before and let it sit in the refrigerator overnight.
- Or you can buy your favorite raspberry preserves for the filling.
Cookie Cups
- Add the butter and cream cheese to a mixer bowl. Cream them together for 2 to 3 minutes before adding the vanilla extract. Scrape down the bowl, and, on a low speed, gradually add the flour. Only mix for a minute; the dough will be crumbly.
- Place the dough onto a pastry mat. Knead the dough until all the crumbs have been incorporated into a ball shape. Now flatten the ball into a flat circle and then wrap it in plastic. Refrigerate for at least 2 hours.
- Preheat the oven to 350°F (175°C or 180°C). Place the chilled cookie cup dough onto a pastry mat and separate it into four equal portions. Take one quarter and roll it out on a lightly floured pastry mat. I use ⅛" bands on the ends of my rolling pin to get an even thickness on my cookie cup dough. With a 3-⅛" round cookie cutter, cut out as many circles as possible from the rolled-out dough.
- Spray a mini cup pan with Pam and place a cutout circle of dough into a hole to form a cup. I have a 48-cup pan to bake all the cups simultaneously. Be careful shaping the dough inside the cups. You don't want any holes in the dough, or the filling will go under the cookie cup dough. After each quarter is used, gather all the extra dough between the cutouts and continue to re-roll and cut out until the dough is used.
- Fill each cup with the raspberry filling of your choice about two-thirds of the way full. This will give space for the filling to expand during baking. Bake at 350°F (175°C or 180°C) for 15 to 17 minutes. Let the cups cool in the pan for about 5 minutes, then take a butter knife and go down the outside one cup. The other side should come up and make it easy to get out.
Topping
- After I get all the baked cookie cups out of the pan and onto the cooling rack, I add a piece of a chopped hazelnut right in the middle. Just to give a little crunch. I did not do this, but you could add a raspberry instead of the hazelnut or add both.
- In two separate microwaveable bowls, add the milk chocolate wafers to one and the white chocolate wafers to the other. Start with the milk chocolate and heat in the microwave for 30 seconds. Then stir and heat for another 30 seconds. If you need more heating, only do another 10 seconds.
- When melting the white chocolate wafers in the microwave, it will not get as runny as the milk chocolate, so instead of a drizzle I added just a small scoop on top of the milk chocolate drizzle and the hazelnut, so it looks like whip cream.
Notes
Although this recipe looks complicated, I break it down into parts. I do the filling on the first day and then assemble the cookie cup within the next two days.
Nutrition
Calories: 174kcal | Carbohydrates: 24g | Protein: 2g | Fat: 8g | Saturated Fat: 5g | Polyunsaturated Fat: 1g | Monounsaturated Fat: 2g | Trans Fat: 0.2g | Cholesterol: 14mg | Sodium: 71mg | Potassium: 54mg | Fiber: 1g | Sugar: 13g | Vitamin A: 169IU | Vitamin C: 3mg | Calcium: 13mg | Iron: 1mg