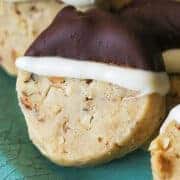
Hazelnut Espresso Shortbread Cookies
Fantastic flavor and easy to make. I love how versatile shortbread can be. Dipping it in chocolate makes it extra indulgent.
Servings: 30 minutes
Calories: 177kcal
Ingredients
- 1 cup Butter unsalted 2 sticks room temperature
- ⅔ cup Powdered sugar 83 g
- 1 teaspoon Vanilla bean paste
- 3 tablespoon Espresso coffee cooled
- 1 cup Hazelnuts ground
- 2 cups All-purpose flour 240 g
- ¼ teaspoon Baking powder 1 g
- ¼ teaspoon Kosher Salt
ICING
- 1 cup Milk chocolate wafers
- ½ cup White chocolate wafers
Instructions
COOKIE DOUGH
- In a food processor pulse hazelnuts till they are small pieces but not dust, you want small pieces. Then add hazelnuts to a small bowl. It gives the cookies a little texture and will incorporate well throughout the whole cookie dough. Set bowl aside.
- Weigh or measure your powdered sugar into a bowl. In a separate bowl weigh or measure flour, baking powder, and salt together. I run a whisk through to blend them.
- In a stand mixer or handheld add the butter and mix on medium speed to cream the butter. I scraped down the sides to make sure all the butter was incorporated.
- Turn the mixer speed down and slowly add the powdered sugar till it is all incorporated. Next, add the vanilla bean paste and espresso coffee. Turn the mixer back to medium speed. I had to stop and scrape down the bowl and across the bottom to make sure it was all mixed together.
- Turn the mixer speed down and slowly add the flour, baking powder and salt mixture till the flour is incorporated. The dough will be a little stiff. Turn the mixer off and add hazelnuts, turn the mixer on for about 30 seconds. You may need to hand mix the dough a little to make sure the hazelnuts go through the whole dough.
- Take the dough out of the bowl and place on a silicone pastry mat. Divide the dough in half and roll and form 2 log shapes about 12 to 14 inches each. It should have a diameter of approximately 1-½ inches. Take plastic wrap and wrap around each cookie dough log, and put it into the refrigerator for at least 1 hour. I took them out after about ¾ of an hour and just rolled them a little, so they do not get a flat bottom, then returned them to the refrigerator for 15 minutes or more.
- Preheat the oven to 350°F (175°C or 180°C). Take one log out of the refrigerator and unwrap the plastic (I put it on a piece of parchment paper so I can slice the log). Slice into ½ inch slices and put them onto a parchment lined cookie pan. I did 4 across and 5 down. These cookies do not spread hardly at all so they only need about an inch between each disc of cookie. Bake for 12 to 13 minutes, leave on pan for about a minute or two after pulling the pan from the oven before moving to a cooling rack.
ICING
- Heat the milk or dark chocolate wafers for 30 seconds in the microwave and then stir. The wafers will still be pretty solid. Heat for another 20 seconds and stir again. If it still needs heating to finish melting do for another 10 seconds. I tip the bowl slightly and dip the about a third of the cookie into the chocolate.
- For the white line, I heat the white chocolate wafers as I did the milk chocolate wafers but I put the white chocolate into a small disposable bag. I used the Wilton 12in. disposable decorating bags with a Wilton #5 tip. You could use a smaller tip but I prefer the #5.
Nutrition
Calories: 177kcal | Carbohydrates: 18g | Protein: 2g | Fat: 11g | Saturated Fat: 6g | Polyunsaturated Fat: 1g | Monounsaturated Fat: 4g | Trans Fat: 1g | Cholesterol: 16mg | Sodium: 80mg | Potassium: 55mg | Fiber: 1g | Sugar: 8g | Vitamin A: 191IU | Vitamin C: 1mg | Calcium: 12mg | Iron: 1mg